Choosing a Trail Flashlight for Wet, Cold, and Gloved Conditions
September 15, 2026Selecting the Right Flashlight, for Challenging Trail Conditions
Choosing the flashlight for trail hiking is not a simple purchase. The flashlight is about understanding the environment you will encounter. When you navigate cold and slippery conditions while wearing gloves focus on practicality than only beam distance or looks. A flashlight that works perfectly in your living room may become cumbersome on a trail. The flashlight's switches can be hard to find. Battery changes can feel fiddly when your fingers cannot feel well. It is crucial to pick a flashlight that fits the circumstances you will face on your adventures.
Consider Your Movement Style
The type of beam you need largely depends on the surrounding environment and your walking style. A concentrated far‑reaching beam may excel in areas. It can be blinding on wooded trails. Bright reflections off tree trunks can hinder your ability to see the trail below. A wider beam is more useful for spotting roots, ground and fellow hikers. When you navigate paths or rely on markers having the right beam spread can make all the difference.
Think about how you intend to traverse the terrain. If your pace will be slow choose a setting to keep control reduce glare and keep your night vision. When you go downhill a quick surge of brightness might help,. A low‑level light lets you read maps or set up camp easily. A flashlight with brightness levels gives flexibility than a simple dim or bright switch.
Headlamps are great for freeing your hands. The headlamp lets the light follow your head movements giving a hands‑free feel. Some people may find a headlamp on hats or hoods though. A handheld flashlight lets you aim the light where you need it. Carrying a flashlight together with a backup gives better safety than using only one complex device.
The Importance of a User-Friendly Switch
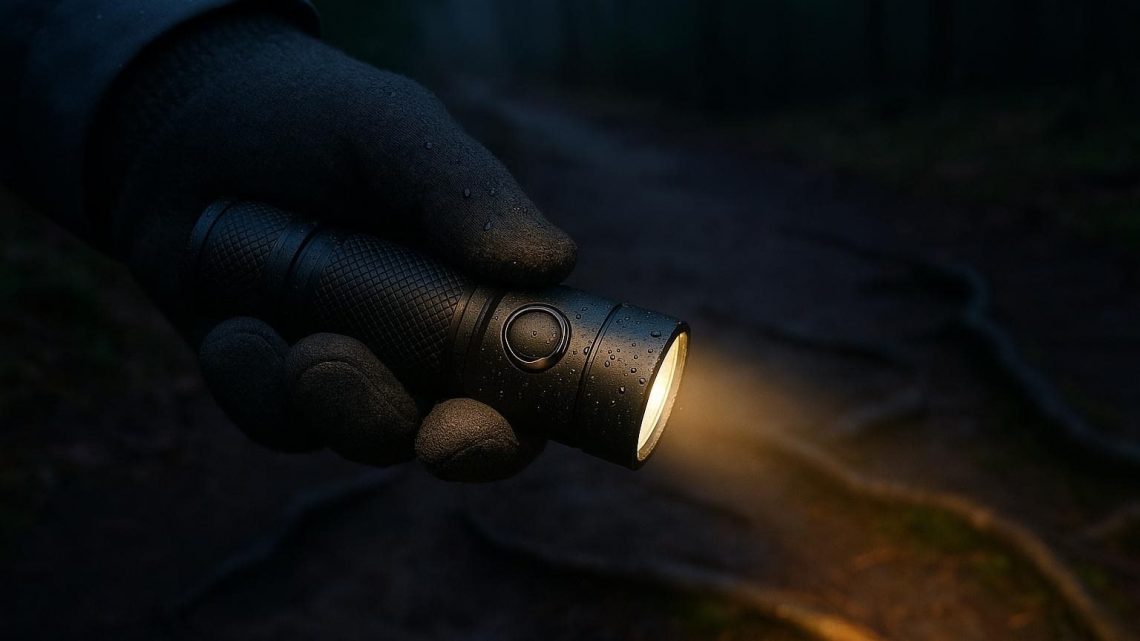
A recessed button may look nice. It can become a nuisance in low light or when you are in a hurry. A small button can be hard to find especially when your hands are cold and wrapped in gloves. Choose a switch that you can feel and operate without looking. A lockout feature is very useful; it stops the flashlight from turning on by accident while it sits in your pack. Make sure you can turn the flashlight off and on with ease.
Test the flashlight's features before you start your trek. Some models start dim or cycle through modes before they reach the brightness you need which can be frustrating when it is cold. A good navigation flashlight should let you reach the brightness you want quickly and with trouble.
A flashlight with a body gives a grip especially when your hands are wet. Look for a tail‑stand that steadies the flashlight for tasks such as reading a map or treating an injury so it does not tip over. A clip that does not snag on clothing is also better. A lanyard can stop the flashlight from slipping between leaves or into the snow.
Understanding Water Resistance
Water resistance is not always reliable. Manufacturers give ratings from tests done in controlled environments. Those ratings may not work in life. Water resistance does not mean the flashlight can survive being submerged or left in standing water. Does it mean you can open the battery compartment in the rain. Always read the manufacturer's instructions about the water resistance level. Handle the flashlight carefully.
After you use the flashlight in conditions check it for dirt around the battery cap or signs that water got in. Look for seals. Be careful not to overtighten the cap. Much force can damage the threads. Hurt the flashlight's quality. After the hike wipe the flashlight clean let it dry at room temperature and then check for condensation or residue, inside the battery compartment.
Preparing for the Cold and Battery Performance
Cold weather can be a reality check, for enthusiasts. I have seen how battery capacity can vary significantly based on type, age, charge level and the specific design of the light. I always follow manufacturer recommendations regarding battery types. Understand that performance can change in environments. I do not simply assume one type of battery will always be superior. I protect batteries from moisture and metal objects by storing them in a pocket or case than alongside car keys and tools.
Before departure I test charged batteries. Verify that any indicator accurately reflects battery status. I know that an indicator light is not a substitute for testing. I use the flashlight at the brightness levels I plan to utilize ensuring that the connector cover of the flashlight is firmly sealed. I carry a light source because loss of power could leave me stranded or cut off from emergency signaling.
I practice operating all controls while wearing my intended gloves. I confirm that I can locate the button by feel manage battery changes without dropping components and attach straps or clips smoothly.
Conduct a Final Equipment Check
A thorough -trip inspection can save me significant frustration down the line:
– Inspect the lens, switch, battery cap, seals, clips and straps for wear or damage.
– Ensure batteries are installed or recharge the light so that it is sufficiently charged.
– Test every mode under relevant conditions to make sure the flashlight functions correctly.
– Practice using the controls while outfitted in my gloves.
– Pack a light and extra batteries especially if I anticipate hikes or challenging weather.
I do not wait until I reach the trailhead to discover that the backup light has corroded batteries. I follow guidelines on battery removal when storing the flashlight for periods especially if leakage might damage contacts.
Assess Your Return Plans
I choose a flashlight that reflects my plans for returning after dark. If it is simply a walk near a campsite a small straightforward light will suffice. For hikes where I may encounter darkness unexpectedly I focus on battery life, weatherproofing and having backup options. Emergency lighting can prove crucial whether it is to assist a companion or to help reorient myself when lost.
I always pack my light within reach ensuring it will not require unpacking to access it. I keep my backup separated so that if one light is lost or soaked I still have a functioning alternative. I inform someone about my route. Return time and I am aware of any regulations surrounding nighttime travel in the area.
Preparation is key. It is not, about purchasing the light. Instead I focus on equipping myself with tools that accommodate my outdoor conditions. This way I enhance my hiking safety ensuring that the light fits both my hands and the nature of my trail.